Showing posts sorted by relevance for query vocabulary. Sort by date Show all posts

Meaningful Word Work and Purposeful Practice--Six Ideas for Fun and Effective Vocabulary Instruction

Welcome (or welcome back) to another installment of my series on teaching vocabulary to gifted students. In previous posts, I wrote about steps to take before staring vocabulary instruction, including assessing what students already know using a quick and easy self-ratings scale. Next, I wrote about strategies for introducing new words and putting a gifted twist on vocabulary instruction.

The whole reason I started researching best practices in vocabulary started when I realized a few things.

  • One, I had gifted students to teach and it was obvious that the regular, run-of-the-mill vocabulary materials handed to me by the district would not be sufficient. 
  • Two, had the curriculum been challenging enough for my students, I found it dreadfully boring. If I found it boring, my students would have positively died. And I'm not into creating that kind of emergency in my classroom. 
  • And three, I knew the importance of vocabulary instruction and it's far-reaching effects, so it was something I felt I couldn't afford to get wrong. Thus began my own journey into deeper learning so that I could really make an impact in our classroom, while also injecting some FUN!

This post goes into a little more depth on the components of quality vocabulary instruction, as well as some of the activities that I used with students to engage them in meaningful word learning and purposeful practice. Just as a quick reminder, a child's vocabulary is a huuuuuuge predictor of academic success in ALL areas.

What the Research Says


One of the best-known researchers in the field of vocabulary instruction is Robert Marzano. In his studies, he found six key steps were the key to better vocabulary instruction. The first three steps are done with the help of the teacher:


  1. Teachers should give students an example, description, and/or explanation of the new term. 
  2. Students need to restate the explanation, description, or example using their own language.
  3. Students should construct a picture, pictograph, or symbolic representation of the term.

(If you hop back to my previous blog post, you will find a free download of a graphic organizer on which students can engage in steps two and three). 

 4.   Periodically, students should engage in activities that help them add to their knowledge of the terms in their vocabulary notebooks.

 5.   Students should be asked to discuss the terms with one another sometimes.

 6.   Students are periodically involved in playing games that enable them to play with terms.

In studies conducted with classrooms using these strategies, it became clear that when teachers engaged their students in alllll of these six practices, students usually showed significant gains in vocabulary learning. 

Other well-known vocabulary researchers, Dr. Kate Kinsella and Dr. Kevin Feldman, point out three things that don't work in their article, Narrowing the Language Gap: The Case for Explicit Vocabulary Instruction: "looking up words in the dictionary, using written context to determine word meaning, unplanned, extemporaneous vocabulary teaching."

Instead,  teachers should focus on four important ideas: wide reading, direct teaching of important individual words, teaching word learning strategies, and fostering word conscientiousness through various activities that encourage language play, and choice in writing (Graves, 2000) and (Nagy and Scott, 2000).

My General Flow of Vocabulary Instruction and Assessment 

Now that I've shown you some research, and told you a little about how I preassess and introduce the words, as well as how I accommodate gifted learners, I'm thinking you might be curious about how it all fit together for me.

A typical vocabulary cycle flows like this for me:

  1. Pre-test students on new words by having students complete a self-ratings-scale prior to starting a new list 
  2. Introduction of new words. If they already know any of the words well enough to define and use in a sentence, they don’t have to study those words. You can find more about how I pre-assess for vocabulary in this blog post.
  3. Students add their words to our  “Map It Out” cards. We discuss the definitions of the vocabulary words together. Students continue to work on these throughout the entire cycle, starting with the synonyms and antonyms (you can even do this part together) and reserving the sentence writing portion until near the end. The “Map It Out” cards are great for students to keep with them when they are working on the other learning activities throughout the cycle, too!  They can always go back to the cards and add to or revise them as they learn more about their words. You can read more about introducing the words and find a free download of the Map It Out cards here.
  4. Students add their words to a catalog or make word wall cards for each root or affix. The “Map It Out” cards themselves are sized to fit on a 5 x 7 notecard or in a composition notebook. I like students to keep a record of all of their words for the year to use for reference and as evidence of all the learning they’ve accomplished! 
  5. Students choose one to three (or more) learning activities (like the ones outlined below) to complete. *The number of activities chosen should be a reflection of how much time students have and the number of activities you think each student needs. Gifted students may require much less repetition than “typical” peers or students with other learning differences so the activities that go more in-depth may be a better fit for them!* 
  6. Use a quick-check strategy every couple of days to measure progress on learning. I do not use this as a graded quiz. It is meant to be a low-stakes, low-risk tool that students can use to quiz themselves as they are progressing toward mastery. This is a research-based strategy that has been shown to increase retention. 
  7. Assess student learning following the completion of the activities.

This cycle is flexible, but I found it generally took about 7 school days to get everything accomplished. Yours might take more or less time, depending on how much class time you can dedicate to it, and of course, on your students' needs. 

How I Encouraged Word Play in My Classroom

While I definitely engaged students in the super important pre-assessment and direct instruction activities, my FAVORITE part of the vocabulary learning process was definitely allowing students to engage in different activities that helped students achieve deep learning and understanding of their words. This was definitely the part my students enjoyed the most, too.

I'll outline a few of my favorite activities here, and maybe even provide a *free* download for you at the end.  

"WordTube"

This activity is a play on the popular YouTube website. Students write each assigned vocabulary word and draw a picture of it on a “WordTube” screen. Then they use the “Up Next” boxes to write the part of speech, identify the roots/affixes contained in the word or the origin if the word does not appear to have Greek or Latin roots or any affixes,  and define the word. Students should paraphrase the definition, as this strategy requires more critical thinking and will ultimately help them remember the meaning of the words better. 

Word Analogies

Students create their own analogies for vocabulary words. Creating and using analogies when learning new material is a research-based strategy that requires students to have a deeper understanding of vocabulary words, activates prior knowledge, and helps students bridge the gap between their schema and new learning. There are two ways students can use this strategy-- students can create their own analogies for vocabulary words and complete the entire analogy. Or,  students can create partial analogies that they can trade with a partner to solve. For this option, they must also make up an answer key (I suggest they create the answer key first). You'll want to be sure to teach children the different kinds of relationships you can create with analogies--for example, analogies can show part to whole relationships, the can reflect synonyms, antonyms, time sequences, increasing or decreasing intensity, etc. 

Shades of Meaning

For this activity, students generate semantic gradients for their vocabulary words. This requires them to think of or find words that are semantically similar to their vocabulary words and then to arrange the words in order. This activity helps students make meaningful connections between words they already know and their new term. There are, again, two variations of this activity that are fun and useful. For one variation, students would either think of, find (or be provided with) a list of synonyms that align with the original vocabulary word. They would then arrange the terms in order from the strongest expression of the term to words that express the term to a lesser degree.  

For the second variation of the activity, students think of or look up 5 synonyms and 5 antonyms for the vocabulary word. They place the vocabulary term in the center of the continuum and then arrange the synonyms and antonyms so that they get stronger as they move away from the center. When students are finished, they should discuss with someone why they chose to put their words in order. They could write their rationale instead if no-one is available to discuss. 

I like to allow students access to both options because some terms don’t really have opposites. Further, I always allow some flexibility with the number of synonyms and antonyms students have to find, as some wordsparticularly words from content area studiesdon’t have many synonyms or antonyms. Also, since these are fairly subjective and there is lots of “grey” area in terms of how the words are arranged, grading these should either be avoided, aside from completion, or rely heavily on the child’s explanations. I highly suggest this activity be completed with pairs or small groups of children to encourage the rich conversations that can occur as they are determining the order in which to place the words. 

Making Connections

Making connections between words really encourages students to think deeply about the meaning of words, and how they relate to other words. This activity is well-suited for small groups of students, as well as the entire class at once if you’re all studying the same words at the same time. 

Students are each assigned one or two unique words, and then they spend time interacting with others in an effort to find a word that they feel connects with their words. Eventually, students settle on a connection or match. Then, students explain either in writing, to the class, or just to the rest of their group members how their terms are connected. 


You will want to spend some time with your students discussing the difference between surface-level and deeper connections. For example, students need to look past words having the same number of letters, starting or ending with the same letters or sounds, being in the same chapter in their science book, etc. The activity (and related research) suggest that making deeper connections between words and concepts are really what will help cement the vocabulary into children’s learning, creating long-lasting, authentic learning experiences. 

Interview a Word

This activity is great for helping deepen students’ understanding of words and their possible connotations. One student “becomes” one of the words, and the other student is the interviewer. It
is fun to encourage the “words” to show their personality and act as though they were truly embodying their word. My students really enjoy acting things out like this! I suggest doing this activity in pairs or small groups, however, if a child is working independently, he or she can just write down the answers to the interview questions on paper instead of posing the questions for someone else to answer.

For this activity, you may find it useful to allow students access to websites such as visualthesaurus.com and www.etymonline.com so they can research some possible answers to the interview questions.

As a fun aside, having students make and wear nametags for this activity is a fun way to boost engagement!

Create a Menu

Students get full creative license over designing a menu for a new restaurant and using their vocabulary words in the descriptions. Students start by deciding on a theme and name for the restaurant. Then they decide the names of dishes to include on the menu, all fitting in with the designated theme.  Next, students use all of their vocabulary words to create a restaurant menu. 

In my opinion, it is not necessary that each menu item use a vocabulary word, as long as they have managed to include all of their words on the menu somehow, using them properly in context. 

Creating a themed restaurant and sticking to only including dishes that fit the theme definitely requires higher level thinking skills. If you find this to be too challenging for some of your students, you could allow them to include dishes on the menu that do not fit into a particular theme, as long as they are still using their vocabulary words to write the descriptions.  If you want to take this to the next level, you could do something like have students design and create an actual (miniature) restaurant storefront, or allow students time to visit each other’s restaurants and “order” something off of the menu. 


Sound like fun? 

There are SO many other great ideas for helping your students engage independently with their vocabulary word study. I put three of the above ideas together for you in a free exclusive download if you're ready to give them a try. This freebie is available ONLY to my subscribers and can be found among many other free resources in my free resource library.  Click the image below to gain access to your free copy! *Just to be clear, by clicking to get these freebies (and instant access to the growing collection of free resources in my library of subscriber exclusives), you're also agreeing to be added to my email list, where I'll send occasional messages with fresh ideas, tips, and other resources straight to your inbox. You can unsubscribe at any time.*


If you're ready to save TONS of time, you can find these three activities and many more in my store by clicking on the images below.

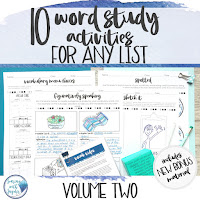
So far, I have FIVE separate volumes of nine activities created and ready to download and print. Each volume includes a table of contents and full-page student-friendly directions for each of the activities. They also include a choice menu for each volume, which allows students to make choices about which activities they work on to learn their vocabulary words each week. It is also a good tool to track completion of menu options depending on how long or how many options you allow students to complete. All three volumes also include a rubric, the "Map It Out" graphic organizer and nine vocabulary activities that can be used with any of your own vocabulary lists. Each volume of my Word Study Activities also has one or two FREE bonuses, from a formative assessment tool to a student activity proposal form to a pre-assessment and self-ratings scale. 


I also bundled these activities together for big savings. You'll get all five volumes (45 activities!) and the corresponding bonus resources for the price of four volumes!  If students complete one different activity a week, there are enough activities in the pack to last the entire year (or longer)! You can access the bundle by clicking the picture below.


Let me know if you have any questions! I love hearing from my readers! 


0


Signature

3 Easy Ways to Boost Your Vocabulary Assessment

Welcome, friends! This is the last installment of my series on vocabulary instruction, and it's all about the A-word.

Yep.

Assessment. Were you thinking I'd say something different? ðŸ˜³

All joking aside, this part of your flow of vocabulary instruction is juuuuuust as important as any other part, even though it can sometimes feel like a pain to tackle.

I'm sure you assess your kids' vocabulary learning. And if you're like (the old) me, you probably have students complete some kind of fill-in-the-blank, matching, define-the-word-and-use-it-in-a-sentence type of test to see whether the learning 'stuck,' right?

Seems to make sense.  If you have a vocabulary curriculum or component in your ELA set, there might even be a set or ready-made quizzes you can use.

Quick and easy. Score and grade. Done. ✔️

So simple, buuuuttt, maybe it's a little too simple.

The thing is, traditional vocabulary assessments aren't really telling us that much about the actual mastery of the word. Mastering those kinds of tests is really about a child's memorization skills, isn't it? Sure, they can get all of those things right on the test this week, but what about when it comes to using it in their writing next week.

We've got to get past providing quizzes that require short-term memorization and move into assessment activities that require more critical thinking and creative use of the words.

But, how, right?

Well, I have three ideas to present to you (though I'm POSITIVE there are more).

*If you have any other great ideas you think I should add, PLEASE leave a comment or send me an email. I'd be happy to expand on this list with your great ideas!*

Complete the Clause

One way to up the critical and creative thinking factor on vocab assessments is to create a clause/sentence with the vocabulary word italicized. Instead of ending the sentence with a period,  end it with a semicolon and have students write the second clause so that it explains the italicized word. 

Upper-grade example: 

You write: The hikers ascended as quickly as possible to the summit of the mountain ahead of the deluge

Students write the next clause: the extreme rainfall would have made it very dangerous for them to continue.  

Lower-grade example: 

You write: Campers at the park finished the shelter just in time; 

Students write: now they will be protected from the wind and rain. 

Since this is a fairly complex thinking task, using only 4-6 words is probably the best idea.

Is that right? 

This time, you will write different complete sentences with the vocabulary words italicized. Sometimes the sentences should use the word incorrectly, and sometimes they should use the word the right way. Students need to decide whether the italicized word is being used correctly or not and justify their response with an explanation. 

Modified Cloze

Vocabulary words are written into a passage, then deleted and left in a word bank. Students choose words from the bank to complete the sentences, using context clues for assistance. 

Simple enough, right?

How does this fit into a differentiated classroom-- will I have to create 30 different tests? 

The short answer is not really! You should be able to create one test for each list of words provided to the students in your class. If you've given your class three or four different lists of words, yes, you'll need to create a three or four different tests. But you really only need to choose the most important 4-6 words from each list and test on those. It's more work initially, but once they're created you can reuse them for years to come! 

A Trick to Make it Easier

One fun (and potentially time-saving) way that you can put a twist on these assessments is to allow students to submit their own clauses, sentences, or passages to be used for the assessments. You can choose from the submissions and use those for the quiz. Of course, students will need lots of practice writing the passages, sentences, and clauses to be meaningful, but this provides students with a big motivator and an authentic audience for writing, so it seems like a win-win to me!


One Note of Caution: 

As with anything new in your classroom routine, children should have plenty of opportunities for practice and be witness to lots and lots of modeling for these vocab strategies. You should feel confident by the time they are completing these activities on their own that students are truly showing their vocabulary learning and not getting hung up on directions or task complexity. 

Before you go...

If you haven't already, be sure to stop and check out my other posts on pre-assessing vocabulary, instructional strategies, or learning activities, you can read them here (they're the first four posts on the page!). 

P.S. Creating fun and engaging (research-based) vocabulary activities is no small task. If you're ready to try something new but don't have the time to create them yourself, be sure to check out this resource. There are 36 unique and fun (and research-based) learning activities that students LOVE to complete. Click the picture if you're interested, and be SURE to go back to my last vocabulary post here to get a free sample of three of the activities to try for yourself before you invest. 

Sources:

  • Strategies for Vocabulary Development by Dr. Kate Kinsella, Dr. Colleen Shea Stump, and Dr. Kevin Feldman
  • Vocabulary: Five Common Misconceptions by Nancy Padak, Karen Bromley, Tim Rasinski and Evangeline Newton
SaveSave
0


Signature

Teaching Vocabulary to Gifted and Advanced Learners--Instructional Strategies that Work

You may (or may not!) have been handed a list of required vocabulary words that you are responsible for teaching for the year.

But if you're like me, you were probably not handed any curricular materials or instructions for how to actually teach those words to your general education students.

And you were almost definitely not given any ideas for how to teach the words to your gifted and advanced learners.

Pinterest pin for Teaching Vocabulary to Gifted and Advanced LearnersThen again, maybe you were lucky enough to be supplied with everything you needed to teach this very important knowledge to ALLLLL of your students (Yay, you! #whereareyouteaching #aretheyhiring?#i'monthenextbus/flight/taxi #seeyousoon hahaha 😂).

No matter where you fall in this spectrum of preparedness, if you are looking for some fresh ideas on how to teach new vocabulary to your students, I hope to offer you some help!

Urgency: Why Learning New Vocabulary is SO Important


Even for gifted children who may have already indicated strong word knowledge or aptitude on achievement or intelligence measures, the process of acquiring new vocabulary remains extremely important.

And yet, vocabulary instruction, even for verbally gifted students,  is something that gets pushed to the wayside sometimes. I'm here to tell you that vocabulary instruction truly should be an integral part of not only your language arts instruction but also your math and content area instruction as well!

A simple search will reveal that a strong vocabulary is absolutely essential for reading comprehension. It is a key indicator of future success in school (and life).

Virtually all understanding of any complex idea is dependent on knowing the words used to describe that information. When picturing your gifted student and their thirst for advanced knowledge, it's easy to see how important it is to teach them how to learn the meaning of new words.

Not to mention, when you consider student engagement, learning about and playing with language is often something that gifted children really LOVE doing!

So it's SUPER important, and also can be incredibly fun and engaging for your students. Have I convinced you yet? Ready to learn about how to get started?

Effective Strategies for Introducing New Words

STOP! Before you do anything else with your vocabulary instruction, you've GOT to start by determining what students already know. Consider hopping over to this blog post here for tips on how I quickly and easily pre-assess student knowledge (there is a free printable involved, so go ahead, I'll wait ). And if you're ready to see the kinds of activities I use in my classroom (and another freebie), click here.

Ok, you're back. I missed you.

So, after you know which words your students need to know, it's time to think about how to use research-based methods for teaching the meaning of new words. Here are a few ideas to get you started.

  • Introduce the words in student-friendly language. Use them in the context of meaningful sentences or stories that students can connect with. Model how the word is used in real life. 
  • Have students put that information into their own words. This is a VITAL step. Before allowing students to go off and work on committing these new words to memory, it is really, really important that you be sure that they do understand the real meaning of the word. Marilee Sprenger (2005) calls this "recoding," and notes that this is an opportunity for you to help them correct any misconceptions before the wrong meaning gets embedded in student's long-term memory. 
  • Have children draw a picture of the word. If they can't draw it, they don't really know it (Ruby Payne, 2009). 
  • Find synonyms and antonyms for each word. This is another crucial step. It helps deepen and solidify student's understanding of the words, empowers them to define the word in their own terms, and makes it easier for students to connect the new words to what they already know. 

The Gifted Component

The steps above will work whether you are teaching typically developing students, advanced/high achieving students, and gifted students. However, there are a few important things to remember when you have gifted children in your class. 

Gifted children need less repetition. Most children need repeated exposure to new words before they are truly learned. You may have to revisit several of the above steps with your typical students. The gifted difference will come in when you note that a typical gifted child will need FEWER repetitions, maybe as few as 1-2 more exposures to the word will do it for them.

Gifted children love opportunities to play with language. In your explorations, you will find it easier to connect with your high IQ students if you can add in some component of wordplay, even starting with introductions to new words. Consider using jokes, puns, song lyrics, poems, and figurative language as you put forth the new terms. 

Gifted children need complexity and depth. While the above introductions to the new words are very important, the reinforcement activities you have students do next as they continue really learning the words are just as important in your quest to meet their needs. My next post will provide more detail on this (stay tuned). If you want a sneak peek into some of the activities my students LOVE, check out these resources in my store. But, I promise, I'll be back soon to expand on these fun activities!

                           image of resource link word study activities for any list volume one    image of resource link word study activities for any list volume one

{Need a way to quickly implement some of these tips? Click the image below to grab a FREE copy of the graphic organizer I created for students to keep track of their vocabulary words. (It's part of my growing free resource library!) Spaces are provided for the word, a sketch, synonyms, antonyms, definition, and sentences. I sized them to be cut out and glued inside a composition notebook. They even have a rounded tab for quick reference. *Just to be clear, by clicking to get these freebies (and instant access to the growing collection of free resources in my library of subscriber exclusives), you're also agreeing to be added to my email list, where I'll send occasional messages with fresh ideas, tips, and other resources straight to your inbox. You can unsubscribe at any time.*}

image link for vocabulary graphic organizer freebie
Next up: Learning activities that foster creativity, fun, and deep thinking. You can get there by clicking here.

I love hearing from you! Are there other strategies for introducing new words that you have found especially effective? Send an email to jen@soaringwithsnyder.com.

References:
Sprenger, Marilee. Teaching the Critical Vocabulary of the Common Core. ASCD (2013).
Winebrenner, Susan. Teaching Gifted Kids in the Regular Classroom. Free Spirit Publishing (2000). 


SaveSave
0


Signature

Teaching Vocabulary to Gifted and Advanced Learners--Pre-Assessment

Tackling vocabulary instruction in any classroom is a complex challenge. Add in students who function above or below the mean, and suddenly trying to meet everyone's vocabulary needs can feel pretty daunting! If you've ever felt overwhelmed by trying to figure it all out, you're not alone. I feeeeel ya!
It took me some time, but over the years, I feel like I ended up with a sort of "system" of differentiated vocabulary instruction that worked really well for both me and my students. In the next few posts, I'd like to take you through my complete setup.

In the Series...

We'll start here with pre-assessment, and move on to instructional strategies here. Next up is independent learning activities, as well as some formative and summative assessment strategies used to measuring student growth. There are so many fun and simple things you can do with vocabulary instruction, I can't wait to share my ideas with you!

I hope you'll join me as I spell it all out.  If you have any questions along the way, free to leave it in a comment for me at the bottom of the post or send an email to me: jen@soaringwithsnyder.com I would love to hear from you!

First Things First

Before I go around passing out new lists of words to my class, I spend time on something super important: FINDING OUT WHAT STUDENTS ALREADY KNOW! Ahh, sorry to shout at you there, but it's something that is SO important to me as an educator of any student, but especially gifted and talented learners who may come to you already knowing up to 80% of what you're planning to teach on any given day.

There are many ways to quickly pre-assess. It can be as simple or as involved as you like. KWL charts, concept maps, graffiti walls, and formal pretests with multiple choice or short-answer prompts are some of the ways to check on students' prior knowledge.

{Want to know more about this? Pop on over to this post here for more detailed information about pre-assessing student knowledge, including explanations for twelve different ways to do it.}

My preferred method for pre-testing vocabulary is having students self-rate their knowledge of the word list. This is a research-based strategy credited to several authors (Blachowicz, 1986; Young et al. 2002, and Stahl & Bravo, 2010). 


The Self-Ratings Scale

With a self-ratings scale, students are presented with the words and are asked to rate their knowledge and understanding of the words on a spectrum. It makes SO much sense if you think about your own understanding of words. Some words you have seen a zillion times, used them in your everyday vernacular, and could teach someone else about them in your sleep. Other words you may have seen and been able to infer the meaning in context enough to get by, and some words are completely new to you and you have approximately zero ideas of what they mean. 

Truly, we are the only ones who know the depth of our own understanding, so why not use this to our advantage in the classroom, and trust that students can be empowered to do the same kind of self-reflecting?

Using a self-ratings scale can be done very informally using a fist to five-finger rating, with zero fingers up (fist) reflecting that a student has never heard or seen the word, all the way to a five-finger rating, meaning the student knows the word and it's definition and can teach it to someone else/use it in a meaningful sentence. 

For me, though, I like having a paper record of which words students are familiar with, and which ones are not known as well. It's nice for me to hang on to for my records, and it's fun for students to see their own growth before/after the unit. 
Picture of vocabulary self-rating scale for teachers to use with students. Includes  link for free download
For the paper version, students are presented with a word (or words) and then they take a moment to reflect on their current understanding of the word. Then they give themselves a rating--this can either be done with a number scale or on a chart. Ratings range from students never having seen the word, to seeing it before but not really knowing what it means, to seeing it and being able to define it, to knowing it so well that they can both define the word and use it in a meaningful sentence. 

When students indicate knowing the word, it's meaning, and the ability able to use it effectively in a sentence, I do prefer them to prove it by defining the word and using it in a sentence so that I can judge whether they truly know the word or not. 

However, if we were ever short on time (who isn't?!), I developed a quick color-coding system for students to use. With their highlighters, students marked words with red (or pink), yellow, and green to indicate how well they knew each word. If they didn't know it well enough to define and use the word, it was highlighted red, if they kind of knew it and/or could figure it out in context, they marked it yellow, and if they 100 percent understood and could use the word, they colored it green. Words rated red or yellow or marked below 4 or 5 (students being able to define and use words in a sentence) became the targeted words they were responsible for learning during that vocabulary cycle. 

You can make your own ratings sheet or develop your own system, but if you're short on time, feel free to check out the one in my free resource library by clicking the image above or click here for your copy. *Just to be clear, by clicking to get the freebie (and instant access to the growing collection of free resources in my library of subscriber exclusives), you're also agreeing to be added to my email list, where I'll send occasional messages with fresh ideas, tips, and other resources straight to your inbox. You can unsubscribe at any time.*


You may be thinking that students might try fib a little on these self-ratings scales so that they have fewer words to study. I'm sure someone might try it, but because students knew that they were really only hurting their own learning, in the end, I really never had a problem with it. 

Thanks so much for stopping by today! You can find the next post in the series here

Don't forget--if you have a question or comment, feel free to leave it for me below. I love hearing from you!
SaveSaveSaveSave
1


Signature

Meeting the Needs of Gifted Learners: Differentiating Products 5/6

Welcome! This post is the fifth (well, technically the sixth!) post in a series I've dedicated to writing about how teachers can differentiate for students in the classroom. If you'd like to read an overview of differentiation, click here. If you would like to read about pre-assessment, differentiating content, differentiating process, or to see a snapshot of how it looked in my classroom, use the words above or the sidebar to navigate to my other posts.

Today's post is all about differentiating the products that your students complete as part of their learning journey. I'll define it for you, give you some important tips, show you an example of how I did this in my gifted classroom, and I'll even give you a list of ideas you can use in your own classroom.

What Does it Mean to Differentiate Products? 

A product is what students do or make with their newly acquired learning. Products help children think
about and extend their learning. It's something that happens at the end of a lesson unit, month, semester, or even entire year of learning. It can be something as simple as having students compose a poem that reflects their learning, or compiling a portfolio of different assignments, or it can be something as complex as a student-created simulation or documentary. Products allow the teacher to assess student learning.  Products are also quite powerful tools for students to really demonstrate their understanding because they remove some of the barriers put up by traditional paper and pencil assessments. If teachers are looking to truly measure a child's science knowledge, they can devise a way to measure truly that, and not whether students have writing and organizational skills to construct a five-paragraph essay.

Differentiating the products that students produce means that they have access to completing DIFFERENT activities or projects following their learning. They complete these tasks or assignments on their own or in small groups, which allows for independence, variety, choice, and challenge. It also allows for teachers to teach the same content to their class (especially in schools where teachers are required to stay within certain grade bands/knowledge strands) while allowing for the application and synthesis of the knowledge to be expanded within the creation of the products.

An Example of How I Differentiated 

To help illustrate how you can differentiate products in your classroom, I'll give you an example from my classroom. One way I regularly incorporated product choice in my upper elementary gifted classroom was in my bi-weekly word study/vocabulary instruction. My vocabulary study for 4th and 5th graders was based on Greek and Latin roots, prefixes, and suffixes. 

  1. At the beginning of each new two-week cycle, the class and I held discussions about the new roots, prefixes, and suffixes. Students made predictions about the word parts, based on their schema, and clues from words containing the Greek and Latin morphemes. 
  2. Then, we looked at a list of about 20 words that I had provided them, and children rated their knowledge of the words using a stop-light color-coding system. Words that they already knew and could teach to others were coded green and less familiar words were coded yellow (they've heard of the word and/or have seen it, but couldn't really use it in a sentence or explain it well) or red (they had little or no idea what the word meant). The red- and yellow-coded words became their word study words for the two weeks. Occasionally, I selected one or two "must-do" words, especially if they were relevant to a unit of study or if they were mandated terms for students to know. 
  3. We met in small groups to learn more about the meaning of the words and then added them to our word-study journals, with a sketch and/or Frayer model for each unknown word.
  4. Finally, students used the red- and yellow coded words to create a variety of products. At the end of the cycle, we had product presentations. Students looked forward to presenting their products to the class, and it became a really fun bonding time and learning experience for everyone. 
You can see a couple of small examples of student work in the photos below. This is a little script from a mini-play. 

Water Words Word Study Product Choice
                         
And pictured  below is one slide from a slideshow story a student had written incorporating her words.

Bob's Bedroom Word Study Vocabulary Story

Sidenote: 

When I first introduced the product choices to students, I was careful to model for them and show them clearly the expectations for each product choice. The only time I did not do this was when a student had their own idea for a product. For these occasions, I worked one-on-one with the student to develop the criteria for the content, quality, and creativity of the product.

We also spent quite a bit of time for the first several cycles getting out the rubric that would determine their grade, and comparing the work they had done to the rubric. We carefully examined each section of the rubric and determined the meaning of the indicators for content, quality, and creativity, giving examples AND non-examples of what each indicator meant. 

Somewhat unrelated, but I'm guessing that you may be thinking that I was extremely trusting of my students, allowing them to self-select their word study words. The reality is, you're right. I was very trusting of students to choose the words on their own, but it doesn't mean that I didn't ever question them on their choices, or double check their lists while they were working. Again, all of this was a combination of the process of me getting to know my students very well (I did loop with them for up to three years at one point!), some spot-checking on occasion, some informal pretesting, and some honest-to-goodness faith in my students that they could and would do the right thing. I had very few instances of anyone trying to "game the system" and if I had, I would have modified the selection process to include some formal pretesting of the words. 

Some Important Notes About Differentiating Products...

  • You should definitely allow for choice. The choice could be as narrow among just a few pre-planned options that you have for them, 
  • Be sure to set clear expectations around the content, quality, and creativity/originality of the products. I have a rubric that works for many product choices here if you're interested in taking a peek. 
  • Be sure that you and your students agree on a timeline for the entire process, as well as check-in points along the way. No matter what the age of your students, it will be helpful for them if you provide some scaffolding here. Obviously, how much scaffolding you provide should be adjusted according to your students' readiness. At the very least, I suggest having check-ins and/or deadlines for idea generation and selection, storyboarding or planning, creating, revising/editing, rehearsal (if needed), and final turn-in. 
  • Products can be differentiated by readiness, interest, and learning profile, or some combination of the three. 
  • Students might need coaching with certain procedural aspects of the choices they make for their products. For example, if a student chooses to create a video documentary or stop-motion film, they may need some assistance with the technical aspects of making the films. This is a great time to bring in outside experts--parents, community members, even other professionals in your school who can assist your students with these needs. Children can also do some research (another great learning opportunity)! 
  • Using differentiated products in your classroom is a great way to build classroom community. I often set time aside in class for students to share what they had been working on with the rest of the class. Sometimes, we even ventured out to share with other classrooms in the building, too! 
  • Inviting parents in for product presentations is also an excellent way to share products with a larger audience. Research has shown that student engagement and achievement rises significantly when students know that people other than just their teacher will see their work. 
  • Keep in mind, though, that not every student needs to (or wants to) share his or her product every time! This is not only time consuming, but for children uncomfortable in front of the class, it can be a source of unnecessary stress. 

Some Ideas for You

Sometimes the hardest part is getting started, right? I've created several ready-made resources that include product choices in my Teachers Pay Teachers store that you can find here. This is a growing collection of choices for upper and lower elementary students. And to thank you for reading allllll the way down to here, I made a list of many of the product ideas that maybe you'd like to try out. Click on the picture below to download your own free copy of the list from my free resource library. *Just to be clear, by clicking to get the freebie (and instant access to the growing collection of free resources in my library of subscriber exclusives), you're also agreeing to be added to my email list, where I'll send occasional messages with fresh ideas, tips, and other resources straight to your inbox. You can unsubscribe at any time.*

Thank you so much for reading! 

Ready to learn about differentiating the learning environment? Click here! Thanks so much for reading!
2


Signature

Meeting the Needs of Gifted Learners: How Does a Differentiated Classroom Actually Work? 3.5/6


How Does a Differentiated Classroom Actually Work? 

If you're like me, you've finished reading another post (or twoor three) about differentiated instruction and you're thinking, "Well, now what? How can I actually put this information to work for me in my classroom?" It takes lots of practice, and I'm positive there are other teachers doing it differently (and well!) in their classroom, but I'll go ahead and write about how I was able to differentiate in my own classroom. And for the record, these ideas worked for my both in general education classrooms when I had only a few GT identified students and in my self-contained gifted classes where all students were identified as either cognitively gifted or gifted in a specific academic area.  

Some Key Ideas

Classroom Management

The most important aspect of being ready and able to accommodate the different learners in your classroom space is really all about how you manage your classroom. I'm not talking about your behavior plan, clip charts, token economy system, etc. I'm talking nuts and bolts--how to you use each and every minute of your school day to maximize the time you have to spend with your students. The thing that made the biggest impact for me was using a guided math and guided reading type schedule for those two blocks. Whether you do legitimate guided reading Fountas and Pinnell-style or the Daily 5 model, or some variation of those, what matters most is building in time to your schedule each day  to be able to meet with students individually, or in small groups. You could also meet this need for content differentiation by holding a whole group mini-lesson and then assigning several different activities, according to readiness, or you can set up different learning centers according to interests and/or readiness as well.  Structuring your day in these ways will allow a few magical things to happen:

  • When you build in time for small groups, you simultaneously build in time for your students to work independently, which means you are FREE! Run while you can! Joking of course, but seriously, once you've trained your students to function without you constantly hovering providing close guidance and support, you are freed up to work with individuals or small groups as needed. 
  • Your students value the time they get to spend with you one-on-one or in small groups. They look forward to this time and you look forward to it, too, because you get to connect on a deeper level with your kids. 
  • You have time to spend meeting the needs of your students--tailoring materials and content to match their needs and push them towards real growth, which is a BIG win for alllll of the stakeholders. 

Time to Plan

Once you've carved out some time in your day, the next step is making sure you have gathered all the necessary information you need. What do you want your students to know? What do they already know? What do they want to know? How to they learn best? And where will you keep all of this information? I used my paper grade book pages to record pre- and post-test results, also noting which standards students still needed to work on. I also gathered some information about students' interests and recorded them on paper as well. All of this helped me in my grouping and planning so I could be sure to pull students back for small group work as they needed it.

After you pre-assess and gather information, it's time to start planning. If you're new to this, I think it's slightly easier to start in a subject area that has really discrete/distinct skills that are easy to separate from one another. Math, grammar, and content areas are a little less complicated to start with. I'm going to use math for my example, but the same general progression will work for most every subject. Here's my general flow:

  • Pretest, sort information--students with the same missing skills get grouped together. You can see an example of this in my grade book checklist picture above. Sometimes I wrote information in there, sometimes I used sticky notes and stuck them in my planning pages. 
  • I also kept notes on each student using a compacting recording sheet (my last post for a free copy), so that I could to it at conferences and around report card time. 
  • Decide what students can be doing in the time that they buy back. I called my time "Choice Time" but you can probably think of something more creative! For student choice time, students were working on a variety of things. In math, sometimes they worked on learning computer coding from code.org or Khan Academy, sometimes they created games for each other to play, and sometimes they worked on strengthening deficit areas. In language arts, my students had lots of choices about what they worked on--vocabulary/word study activities were a choice based on students' interests, independent reading was always a choice, based on interest and readiness as well. 
  • Decide IF and HOW you will evaluate tasks and learning accomplished during choice time. My own opinion is that these alternate activities don't always need "graded," however they still need to be evaluated using a rubric or some other tool so that students can get feedback--even if it's only feedback on independent study behaviors. Students need to know that what they're doing is valued,  but I also hope to instill in them a sense of ownership and pride in learning for learning sake. 
  • A note about interest-based and learning profile content differentiation--these are, in some ways, lower-prep alternatives to differentiating by readiness. Here's why: generally speaking, if you offer children lots of choices in your classroom, they will gravitate toward what they like most, and you don't have to tailor it as much directly toward individuals. And once you get into the habit of giving students choices, you begin to build up your repertoire of materials and options that can be used over and over again, so it's really not as bad as it sounds.  

Math

Here is what my math block often looked like: (P.S., I say often because there were days where we did lessons and activities as a whole group. #reallife P.P.S. I was BLESSED to have 60-90 minute blocks of time for my instruction, so yes, it did make it easier to structure my time, but it is totally possible to do this in less time--you just have to be a little more judicious with how you build in your choice time--maybe it's every other day, or every third day instead of every single day, but I promise--it CAN be done!

  • 10-15 minutes-Problem Solving in math journals (sometimes differentiated, often not because they were challenging problems on which I allowed students to choose to work collaboratively)
  • 15-20 minutes (sometimes)--Whole group mini-lesson or explanation of math stations/choices
  • 30-60 minutes--Guided math (small group) lessons and choice time. This is either self-directed or done in a rotation style. We changed it up, depending on what we were working on. If children had a big project they were working on, they often just worked on the project the whole time while I met with small groups. In small group time, students learned the skill and practiced it. They had some independent work to complete on their own in class as well. 
  • 5-10 minutes--Exit ticket/show what you learned/Q&A time

ELA

Below are two versions of what the ELA block looked like in my classroom  (again, I had 90 minutes in upper elementary and more like 150 minutes in lower elementary to work with but it can be modified to work in less time):

Version One
  • 5-10 minutes --Independent reading time or Picture of The Day as children trickled in from different classes
  • 5 minutes-- Status of the Class (click the picture to the right if you're interested in downloading one for yourself from my free resource library). *Just to be clear, by clicking to get the freebie (and instant access to the growing collection of free resources in my library of subscriber exclusives), you're also agreeing to be added to my email list, where I'll send occasional messages with fresh ideas, tips, and other resources straight to your inbox. You can unsubscribe at any time.* 
  • 15-20 minutes --Whole-group reading mini-lesson based on a skill that students will be applying during independent reading time 
  • 20 minutes--Choice time--students work on word work, independent reading, or other projects 
  • 15 minutes--Whole Group OR Small group mini-lesson
  • 20-30 minutes--Choice time
Version Two
  • 20 minutes: Whole-group standards-based reading mini-lesson based on comprehension, decoding, fluency, or vocabulary skills that could be applied to any book
  • 45 minutes: Guided reading groups, individual conferences, and Independent Work--students apply the mini-lesson skills or concepts to books on their reading level and then work on word work, vocabulary, and/or other literacy-based centers 
  • 20 minutes: Whole-group standards-based writing mini-lesson
  • 45 minutes: Guided writing groups and/or individual writing conferences
  • 10-20 minutes-Rotation between exit slips, fluency practice, sight word practice, Author's Chair, etc. 

Some Final Notes 

Of course, these general plans worked for ME in my classroom, but you may need to modify them to work for YOU in your classroom. They are intentionally very general. When I taught kindergarten, having students sit and attend to a 20-minute mini-lesson was pushing it for their attention span. Working independently for 45 minutes was also a lofty goal, especially at the beginning of the year. To accommodate students' needs, I broke lessons down into smaller chunks, allowed for shorter spurts of independent work, etc. I worked together with the class for weeks modeling what our classroom looked like, sounded like, and felt like during each stage of our language arts and math blocks. The time spent at the beginning of the year paid off very well in the middle and end of the year when we were truly able to maximize our learning time and minimize distractions and time during transitions. 

If you're ready to read more about differentiating, check out this post on how to differentiate the learning process. 

I hope you found this information helpful! Got more ideas about how to make differentiation work in your classroom? Leave a comment below or send me an email (jen@soaringwithsnyder.com). I love hearing from my readers!

Thank you,
0


Signature
Back to Top